Artillery Projectile Extractor

Artillery Projectile Extractor

By Daniel Evers

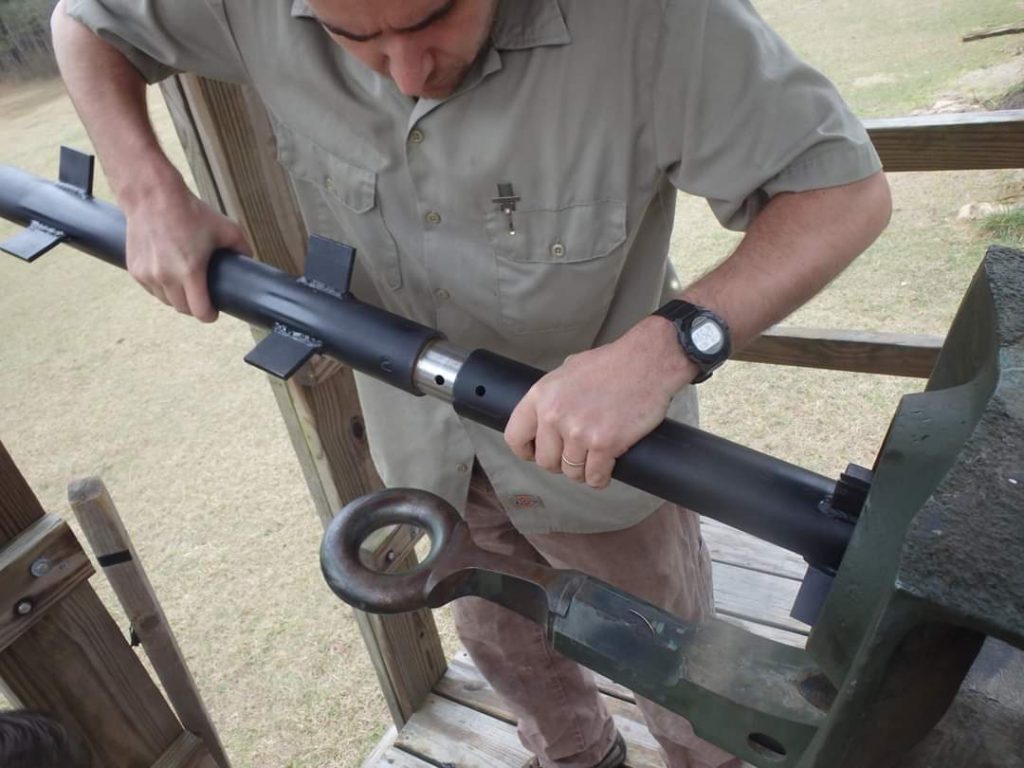
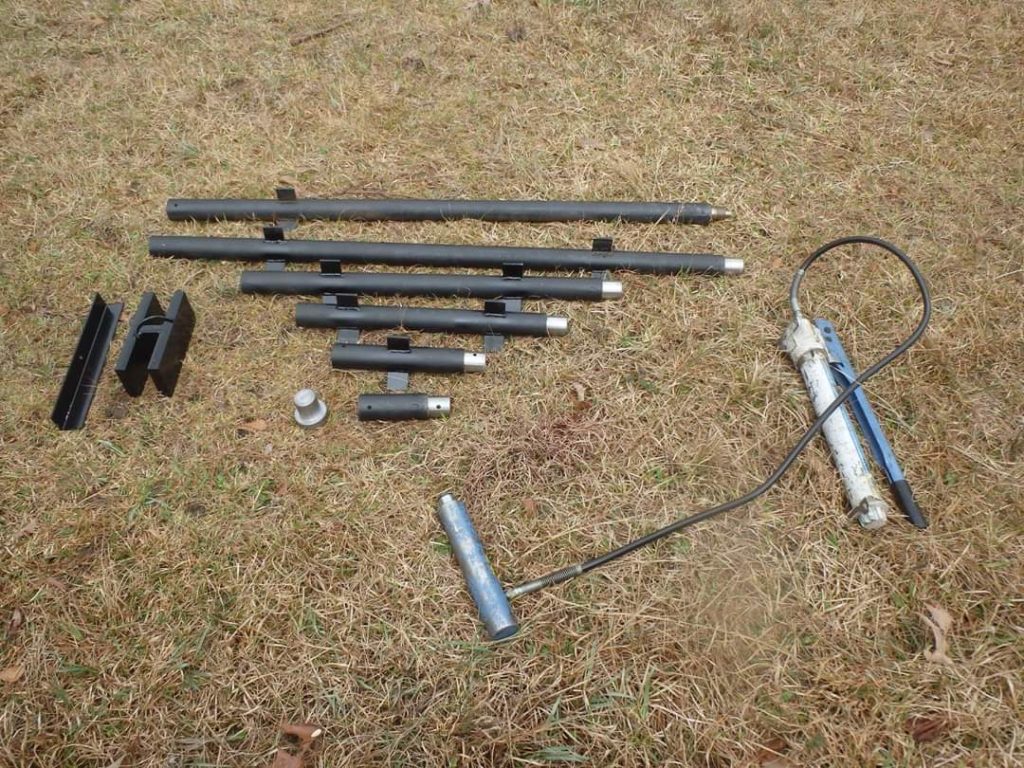
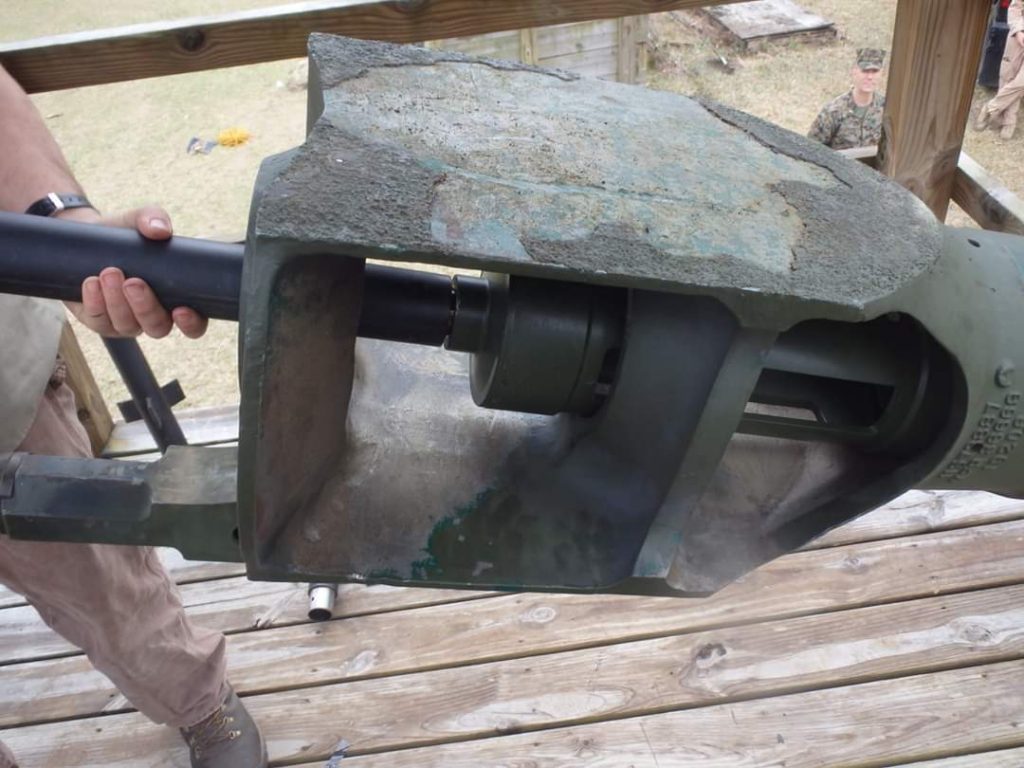
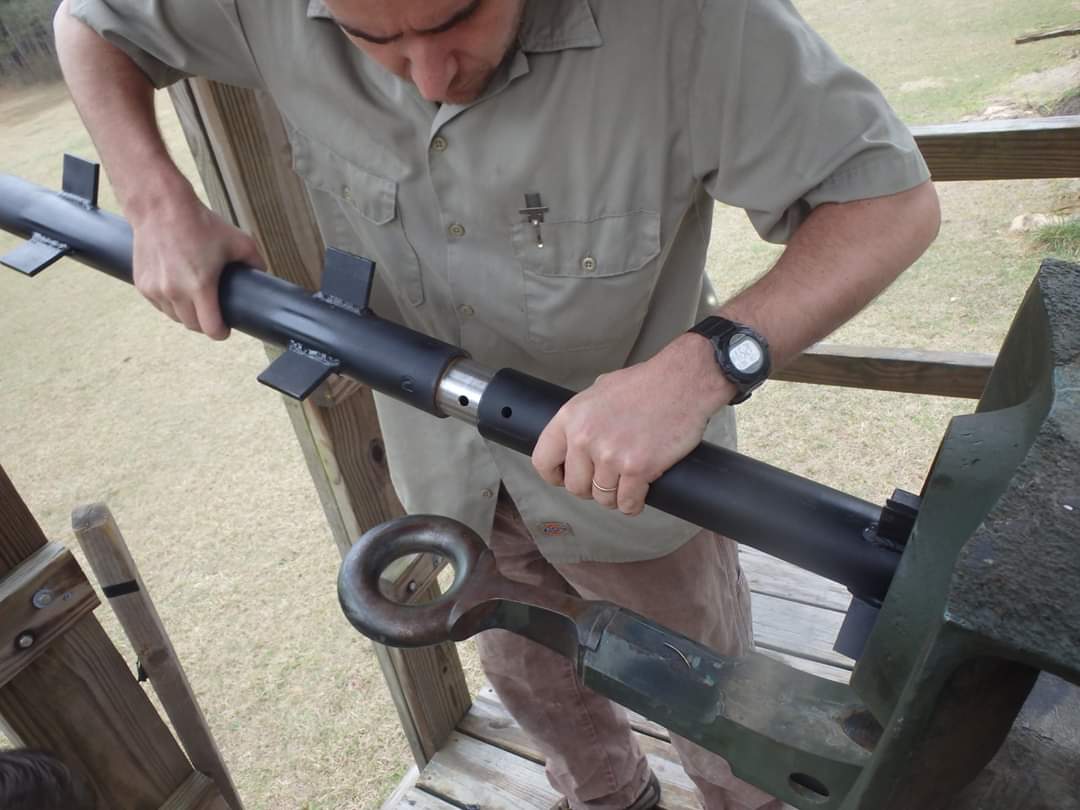
We took a M795 and stuck a M767 ET Fuze on it. We drove the projo into a triple 7 barrel and then had 2 On Kob Trainees hammer it in. At the muzzle, the Artillery Projectile Extractor (APE) which is already SL3 to the Gun is connected to the first pipe and inserted down the tube.

Each section of pipe snaps together and has stand off fins to keep them centered. The fins now have aluminum runners on them to protect the bore of the barrel from damage. The pipes are different lengths so you can use different ones depending on where in the tube the bullet is.

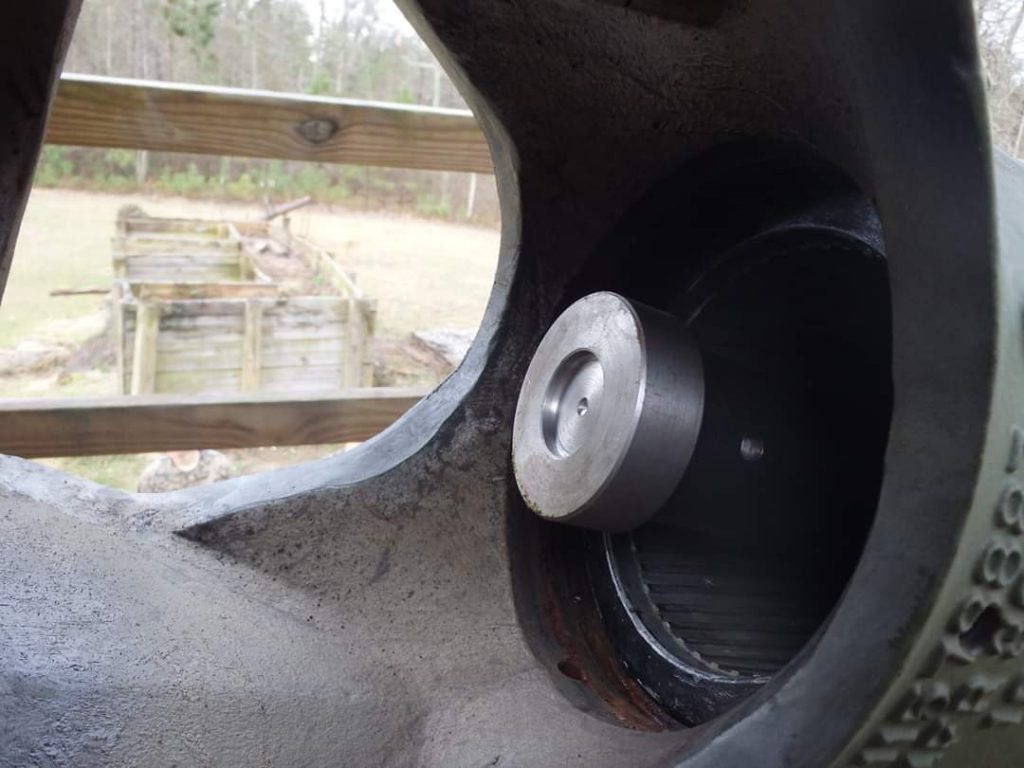
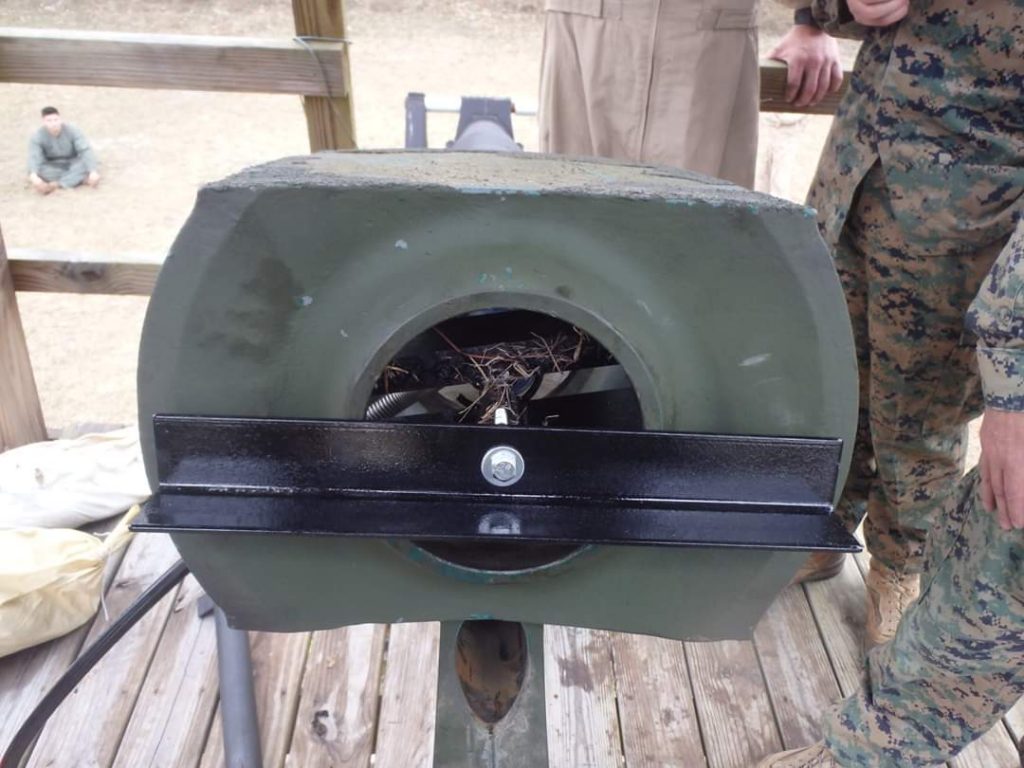
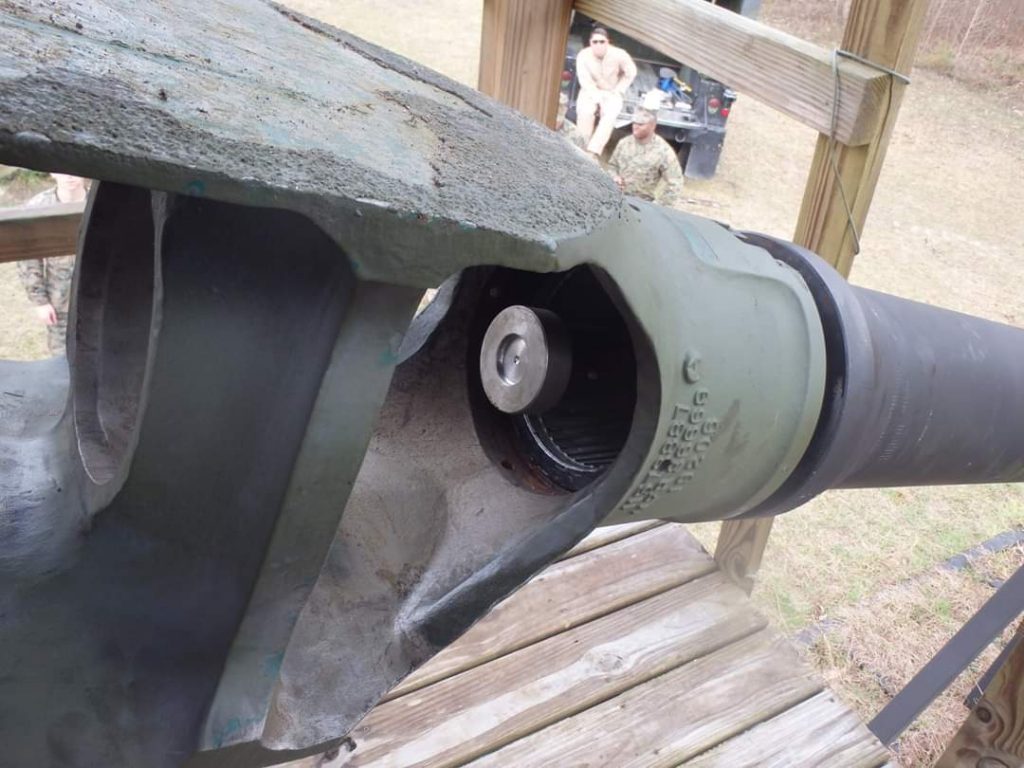
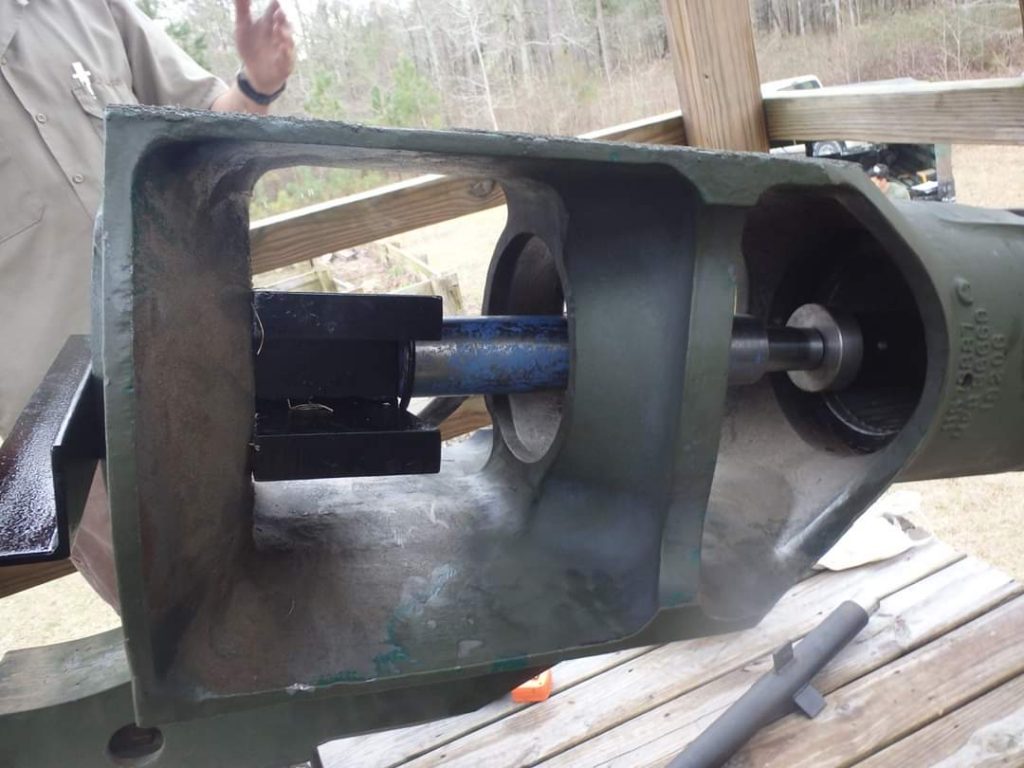
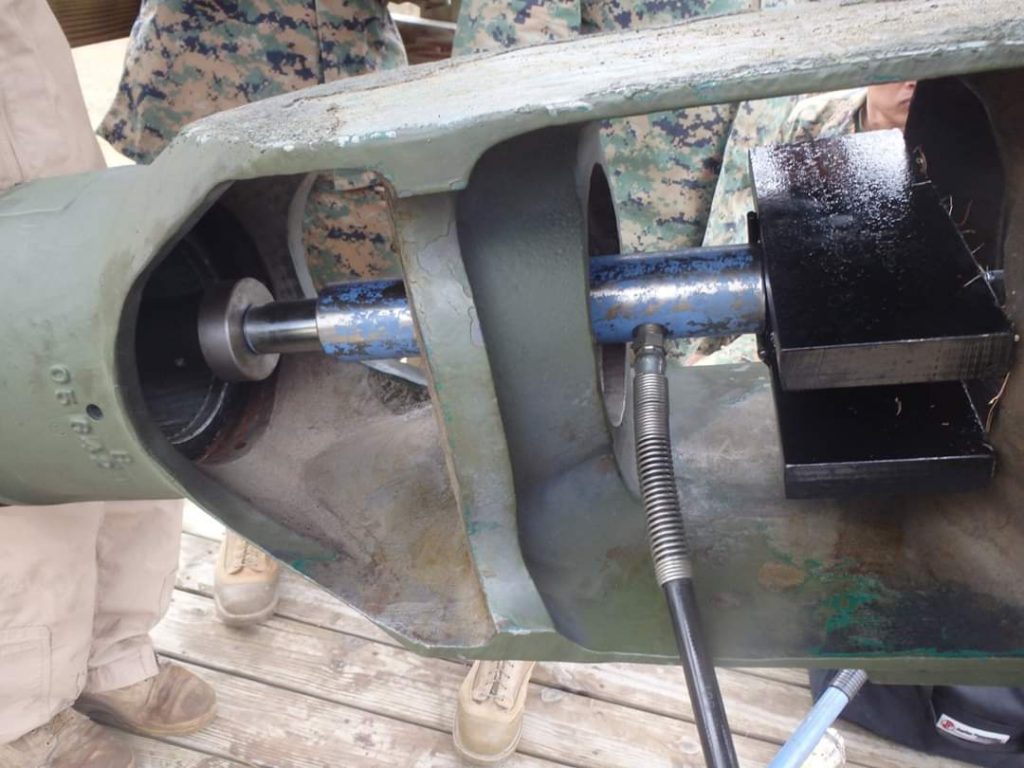
Once the APE makes contact with the projo, a press plate is inserted into the final pipe up by the muzzle. A brace block is inserted into the muzzle and locked into place with a bolt and brace. Finally, a Port-A-Power is pumped between the press plate and the brace block. All the hydraulic power gets put directly on that projo and pops it right out. No 50 Cal, No Water, No 20 LCpls with a Bell Rammer, No 7 ton procedure that “doesn’t exist”.

This is not intended to be an EOD tool. This is intended to be an Artillery tool. My goal here is to give Arty a tool that would keep them from having to call us out unless the projectile is stuck so bad that the barrel will no longer be good to use. This thing is cheap, simple and is infinitely scalable. This is for the 155mm. Others are in the works.

3D Printing Programs

3D Printing Programs

by Andrew Sugg

I’ve been 3D printing for roughly four years and now run the Additive Manufacturing section for my Battalion. There is a lot of software out there to help someone looking at 3D Printing and I’d like to touch on two slicers and two 3D image builders I have some experience with.

To 3D print you’re going to need a slicer to make the code the printer speaks. I started out using Cura. This is free from Ultimaker and works great. I would suggest this for the hobbyist printer looking to keep their investment as low as possible. Cura has a very user-friendly interface and provides settings based on printer manufacturer and model. For instance, I started with a Monoprice Mini and then an Anet A8. Both printers had settings that were already in Cura. Cura is a great program for new user due to the ease of use and allows the user to grow into more advanced settings and adjustments to increase the speed and quality of your prints.

If you are running an Additive Manufacturing program for your unit, Simplify3D (S3D) is the program you want. I ran into this program when I set up my Battalion’s Additive Manufacturing section with the Fusion F410 the software came with. It is a little pricey but well worth the investment. With S3D you can set up multiple printers and filaments as Factor Files. It also allows for multiple settings on a single print. For instance, I printed a 3DLabs F4U Corsair with the first layers set to provide a solid, strong mounting surface for the engine and the rest of the model to be printed as a single layer to reduce weight. Many printer manufacturers have tuned Factory Files for their brand. With the Fusion F410, I simply select the factory file associated with the filament and nozzle diameter, click prepare to print, and then save the file to the SD card for the printer. There are also more advanced settings in S3D that allow for very fine tuning of your prints.

Although there are several sites with free and pay for 3D files such as Thingiverse, 3DLabs, myminifactory, etc. Some items you need will don’t exist out on the internet. This is where learning 3D modeling can help you out a lot. As for myself, I’d consider my knowledge on 3D modeling on the level of the peg and hole toy we played with as kids or in a high-altitude chamber.

The windows-based 3D Builder program is a great resource for new beginners. I’ve used it to design some very simple prints and to cut large prints into smaller pieces. With some playing around, you can take an existing model such as a helmet, MK 82, or other item larger than the available print area and slice it into smaller pieces. My first experience with this was slicing up a Halo IV helmet for my brother-in-law. It was easy to slice the print up into smaller parts for my printer and then add cut-outs for alignment pins to make assembly easier.

The latest program I’ve fallen on is Autocad’s Fusion 360. Upon my initial look at it I was overloaded with all the options. However, there are a ton of tutorial videos and article out there to help get you acquainted. If you can afford it or can use tuition assistance, it is highly suggested that you take a community college course or other syllabus led course on the use of Fusion 360 to take full advantage of its capabilities.

I hope this short blog helps out with deciding what software to start working with. If trying to stay on a budget I suggest Cura and Windows 3D Builder. For the unit level and more professional investment, Simplify3D and Fusion 360 are perfect for providing awesome designs and prints.